

Your WordPress site gets attacked whether you know it or not. Automated bots scan the web constantly, testing login pages, probing plugins, and exploiting outdated software. This wordpress security checklist is not a list of features to tick off. It is a prioritized, business-focused wordpress security guide that explains what you are actually protecting against, why each step matters to your revenue and reputation, and how to do it without needing a developer on speed dial.
Whether you run a five-page service site or a growing eCommerce store, the cost of getting hacked is real: downtime, lost sales, damaged SEO rankings, and the nightmare of cleaning up a compromised database. Let’s make sure that does not happen to you.

Why Hackers Target WordPress Sites and What It Costs Your Business
Before checking boxes, understand the threat. Most WordPress hacks are not personal. Attackers are after one of four things:
- Traffic hijacking: Injecting spam links or redirects to boost their own SEO or send your visitors to malicious sites
- Server resources: Using your hosting account to send spam emails or run crypto mining scripts
- Customer data: Stealing email lists, payment details, or personal information stored in your database
- Ransomware leverage: Locking your site and demanding payment to restore it
The uncomfortable truth is that 90% of WordPress hacks exploit known vulnerabilities, meaning problems that already have a fix available. Outdated plugins, weak passwords, and misconfigured permissions are the open doors. This checklist closes them.
The business impact is not just technical. A compromised site can be blacklisted by Google within hours, wiping out months of organic traffic. Customers who land on a hacked page lose trust fast, and that trust does not come back easily. The average small business spends between $500 and $5,000 cleaning up a hacked WordPress site, not counting lost revenue during downtime.
Key Takeaway: You are not just protecting a website. You are protecting business continuity, customer trust, and your Google ranking. A hacked site can take weeks to recover from.
Phase 1: Foundational Security (Do These First)
These are your highest-priority actions. If you do nothing else, do these. They block the majority of automated attacks before they ever get close to your content.
1.1 Keep WordPress Core, Themes, and Plugins Updated
Outdated software is the number one entry point for hackers. When a vulnerability is discovered in a plugin, it gets published publicly. Attackers then run automated scans to find every site still running the vulnerable version, sometimes within hours of the disclosure.
Action steps:
- Go to Dashboard, then Updates, and apply all available updates
- Enable auto-updates for minor WordPress core releases (Settings, then Updates)
- Review and enable auto-updates for plugins you trust and use regularly
- Delete any plugins or themes you are not actively using, not just deactivating them
A deactivated plugin with a vulnerability is still a vulnerability. Removal is the only safe option.

1.2 Use Strong, Unique Passwords and a Password Manager
The classic brute-force attack tries thousands of username and password combinations per minute. A strong password makes this computationally impractical.
For every WordPress account, require passwords that are at least 16 characters, use a mix of upper and lowercase letters, numbers, and symbols, and are not reused anywhere else. Tools like Bitwarden (free) or 1Password make this manageable across your whole team.
Also change your database password in wp-config.php if it was set by your host during installation with a generic string.
1.3 Change the Default Admin Username
If your main admin account is still named “admin,” you have already handed attackers half of their login credentials. Change it immediately.
WordPress does not let you rename a username directly. Instead, create a new administrator account with a strong, non-obvious username, log in with that new account, and delete the original “admin” user, assigning all its content to your new account.
1.4 Limit Login Attempts
By default, WordPress allows unlimited login attempts. A brute-force bot can try 10,000 password combinations without breaking a sweat. Limiting login attempts to three to five before a temporary lockout shuts this down almost entirely.
Most security plugins handle this automatically. If you want a standalone solution, the plugin “Limit Login Attempts Reloaded” does exactly this with no configuration complexity.
Key Takeaway: Phase 1 stops the automated attacks that account for the vast majority of WordPress compromises. Set aside 30 minutes this week to complete all four steps.
Phase 2: Access Control and User Management
Once your core defenses are up, tighten who can do what inside your site. A disgruntled contractor or a compromised editor account can cause as much damage as an outside hacker.
2.1 Enforce Two-Factor Authentication (2FA)
Two-factor authentication requires a second verification step after entering a password, typically a time-sensitive code from an app like Google Authenticator or Authy. Even if a password is stolen, the attacker cannot log in without also having the second factor.
Enable 2FA for all administrator and editor accounts at minimum. Plugins like WP 2FA or the security plugin you choose will handle the setup. It takes under ten minutes per user.
2.2 Assign the Right User Roles
Not everyone who works on your site needs administrator access. An administrator can delete everything, install plugins, and change critical settings. A contributor only needs to write and submit posts for review.
Giving every user the minimum permissions they need to do their job is called the principle of least privilege. It limits the blast radius if any account is compromised.
For a detailed breakdown of what each role can and cannot do, read WordPress User Roles and Permissions: Control Who Can Do What.
2.3 Audit User Accounts Regularly
Quarterly, log in and go to Users, then All Users. Remove accounts that belong to contractors who no longer work with you, previous developers, or anyone whose role has changed. Dormant accounts with weak passwords are a common attack vector.

Key Takeaway: Access control is your internal security layer. One compromised account with too much power can undo all your other protections.
Phase 3: Install and Configure a Security Plugin to Secure Your WordPress Site
A dedicated security plugin acts as your site’s immune system. It monitors for threats, enforces rules, and alerts you when something looks wrong. Choosing the right one depends on your budget, technical comfort, and traffic level.
3.1 Choose the Right Security Plugin for Your Needs
The major options include Wordfence, Solid Security (formerly iThemes Security), and Sucuri. Each has a free tier with meaningful protection and a premium tier with real-time threat intelligence.
| Plugin | Best For | Free Tier | Premium From |
| Wordfence | Most business sites | Yes, strong WAF | $119/year |
| Solid Security | Beginners, simpler sites | Yes, good hardening tools | $99/year |
| Sucuri | High-traffic, eCommerce | Limited, monitoring only | $299/year |
For a full comparison of features and which plugin suits different site types, see How to Choose a WordPress Security Plugin: Features That Actually Protect You.
3.2 Configure These Features First
Once installed, do not just activate the plugin and walk away. Configure these four features before anything else:
- Web Application Firewall (WAF): Filters malicious traffic before it reaches WordPress. Enable it in learning mode for 24-48 hours, then switch to protection mode.
- Malware scanning: Schedule automatic scans at least weekly. Most plugins default to daily, which is ideal.
- Login protection: Enable login attempt limits, 2FA enforcement, and CAPTCHA from within the plugin dashboard.
- File change monitoring: Alerts you when core WordPress files are modified unexpectedly, which is often the first sign of an active intrusion.

Key Takeaway: A security plugin is not optional for a business site. Even the free versions of leading plugins add significant protection that WordPress does not include by default. Configure it properly on day one, not just install it.
Phase 4: Harden Your WordPress Configuration
Hardening means removing capabilities and access points that WordPress includes by default but that you do not need, and that attackers routinely exploit.
4.1 Disable the WordPress File Editor
From your WordPress dashboard, under Appearance and then Editor (or Plugins, then Editor), you can edit theme and plugin files directly. If an attacker gets into your admin panel, this editor lets them inject malicious code into your site instantly.
Disable it by adding one line to your wp-config.php file:
define(‘DISALLOW_FILE_EDIT’, true);
This does not affect your ability to update files via FTP or your hosting file manager. It removes the tempting shortcut from the dashboard. Note that this is separate from the block editor used for page content. If you experience any issues with your page builder after configuration changes, the guide on Troubleshooting Gutenberg: Fix Common Block Editor Issues covers common problems and fixes.
4.2 Protect Your wp-config.php File
The wp-config.php file contains your database credentials and security keys. It sits in your root directory by default. Move it one level above your public root folder if your hosting allows it. WordPress will find it automatically.
Alternatively, add rules to your .htaccess file (on Apache servers) to block direct HTTP access to wp-config.php.
4.3 Disable XML-RPC If You Do Not Need It
XML-RPC is a WordPress feature that allows remote connections, originally designed for mobile apps and third-party tools like Jetpack. Most business site owners do not use it. Attackers use it for brute-force attacks because it allows thousands of login attempts in a single request, bypassing basic login limiters.
If you are not using Jetpack or a mobile publishing app, disable XML-RPC entirely through your security plugin or with an .htaccess rule.
4.4 Enable HTTPS and Force SSL
If your site is still running on HTTP rather than HTTPS, fix this before anything else. An SSL certificate encrypts data between your visitors’ browsers and your server. It also signals trust to Google, affecting your rankings.
Most hosts provide free SSL certificates through Let’s Encrypt. Once installed, force all traffic to HTTPS through your wp-config.php file or a plugin like Really Simple SSL.

Key Takeaway: Hardening is a one-time configuration task that permanently closes several well-known attack vectors. Most steps take under five minutes.
Phase 5: Backups as Your Security Safety Net
Every security expert agrees on this point: a recent, clean backup is your most powerful recovery tool. If everything else fails, a good backup means you are back online in hours, not weeks.
5.1 Automate Your Backup Schedule
Manual backups get forgotten. Automate them with a consistent schedule based on how often your site changes:
- Daily backups for eCommerce sites or high-traffic blogs where content changes constantly
- Weekly backups for service sites with infrequent updates
- Before every update: Always back up immediately before applying major plugin or core updates
5.2 Store Backups Off-Site
A backup stored only on your hosting server is not a real backup. If your server is compromised or your host has a catastrophic failure, that backup disappears with it. Store copies in at least two of these locations:
- Amazon S3 or Google Cloud Storage
- Dropbox or Google Drive
- A separate hosting account entirely
Plugins like UpdraftPlus (free), BlogVault, or Jetpack Backup automate both the scheduling and off-site storage.
5.3 Test Your Backups
A backup you have never tested is a backup you cannot trust. Quarterly, restore a backup to a staging environment and confirm everything works. Your security plugin or host may offer a staging tool to make this straightforward.
Keeping your database clean and lean also reduces backup size and shortens restore time. Our guide on Database Optimization: Clean Up WordPress for Better Performance walks you through exactly how to do this.
Key Takeaway: Backups do not prevent attacks but they guarantee recovery. Treat backup testing as a scheduled business task, not an optional technical exercise.
Phase 6: Ongoing Monitoring and Maintenance Routines
Security is not a setup-and-forget task. It requires scheduled attention. The good news is that most of this takes under an hour per month once the foundational work is done.
Your Monthly Security Maintenance Schedule
| Task | Frequency | Time Required |
| Apply pending updates | Weekly | 10 minutes |
| Review security plugin alerts | Weekly | 5 minutes |
| Check user account list | Monthly | 10 minutes |
| Run malware scan | Monthly | Automated |
| Review file change alerts | Monthly | 10 minutes |
| Test backup restore | Quarterly | 30 minutes |
| Audit plugin list, remove unused | Quarterly | 15 minutes |
| Review and rotate passwords | Every 6 months | 20 minutes |
Watch for These Warning Signs
Your site may already be compromised if you notice any of the following:
- Sudden drops in Google search traffic, since malware injections hurt SEO rankings fast
- Visitors reporting redirects to unfamiliar or suspicious sites
- Google Search Console flagging “hacked content” warnings
- Your hosting provider alerting you to unusual outbound email volume
- New administrator accounts you did not create
If any of these appear, treat it as an active incident. Take the site offline if necessary, restore from a clean backup, change all passwords and security keys, and run a full malware scan before going live again. Skipping the investigation step means the same vulnerability gets exploited again within days.
Key Takeaway: Monthly routines catch problems before they become crises. Build them into your calendar the same way you would a financial review or team check-in.
The Complete WordPress Security Checklist at a Glance
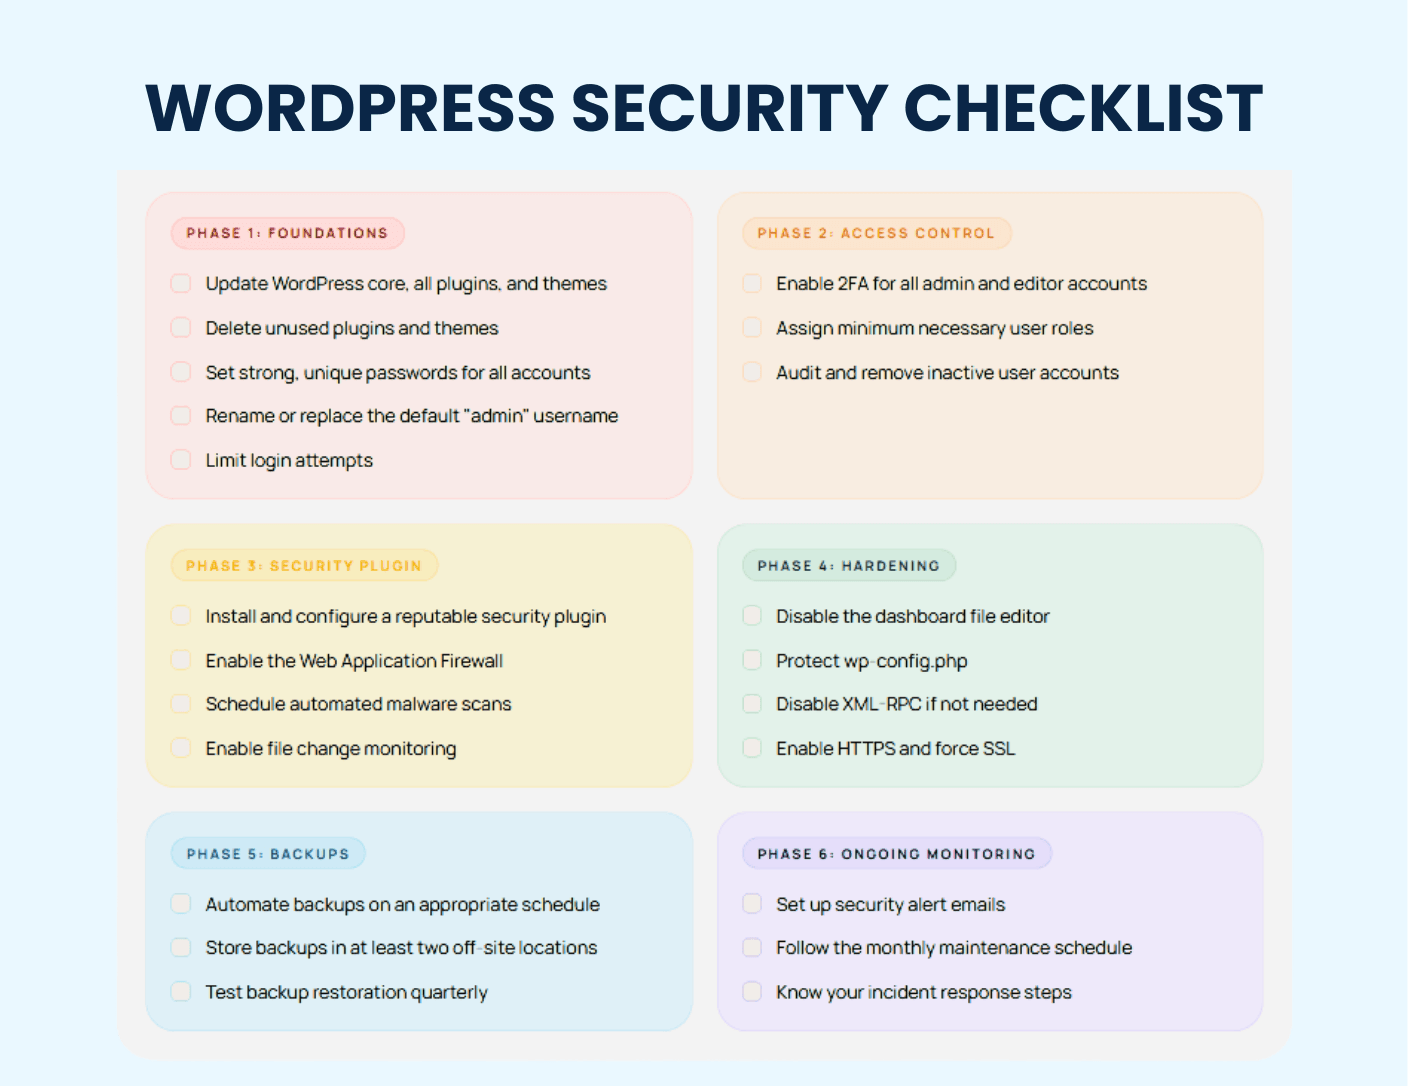
Phase 1: Foundations
- Update WordPress core, all plugins, and themes
- Delete unused plugins and themes
- Set strong, unique passwords for all accounts
- Rename or replace the default “admin” username
- Limit login attempts
Phase 2: Access Control
- Enable 2FA for all admin and editor accounts
- Assign minimum necessary user roles
- Audit and remove inactive user accounts
Phase 3: Security Plugin
- Install and configure a reputable security plugin
- Enable the Web Application Firewall
- Schedule automated malware scans
- Enable file change monitoring
Phase 4: Hardening
- Disable the dashboard file editor
- Protect wp-config.php
- Disable XML-RPC if not needed
- Enable HTTPS and force SSL
Phase 5: Backups
- Automate backups on an appropriate schedule
- Store backups in at least two off-site locations
- Test backup restoration quarterly
Phase 6: Ongoing Monitoring
- Set up security alert emails
- Follow the monthly maintenance schedule
- Know your incident response steps
Frequently Asked Questions
What to Do Next
Security improvements are most effective when tackled in order of risk. Here is your action plan for the next seven days.
Start with Phase 1 and Phase 2 this week. Update everything, fix your admin username, enable 2FA, and audit your user accounts. These steps alone eliminate the vast majority of automated attack risk and take under an hour combined.
Choose and configure your security plugin. Use our guide How to Choose a WordPress Security Plugin: Features That Actually Protect You to select the right tool for your site size and budget. Install it before moving to the hardening steps in Phase 4.
Get your backup system running today. If you do not have automated, off-site backups in place right now, this is urgent. Before your next plugin update, have a backup solution active. Review Database Optimization: Clean Up WordPress for Better Performance first to reduce your database size, which makes backups faster and cleaner.
Build your maintenance routine into your calendar. Copy the monthly task table from Phase 6 into your project management tool or calendar. Assign each task a recurring date. Security that lives in a checklist but not in your schedule does not actually protect you.


